.svg)


How to Make Stickers?


Who does not love stickers? These little, adhesive works of art are extremely adaptable. They serve as a source of entertainment, décor, branding, or creative inspiration. Stickers are useful for everything from personalizing your laptop to branding your business, and the greatest part is that you can design them yourself!
Have you ever wondered how to make stickers at home or how businesses create the eye-catching unique designs you see on water bottles, laptops, and even cars? It is simpler than you might imagine. Whether you're an artist wishing to transform your designs into real objects, a company owner wishing to personalize your brand, or just someone who enjoys crafting, knowing how to create stickers opens up a world of creative possibilities. And the best part? You don't need expensive tools to start making stickers.
In this blog, we will guide you through creating and customizing your stickers, whether for personal use, gifting, or starting your own sticker business. Are you ready to implement your creative ideas and learn how to produce stickers from scratch? Let's get started on this fun and creative journey!
Materials You Will Need to Make Stickers
To make professional-quality stickers, you must first gather the necessary supplies. Whether you're creating stickers for fun, personalizing your stuff, or starting a sticker-selling business, the following list will cover the basic supplies and offer some options based on your budget and needs:
Sticker Paper
Sticker paper is the base of your stickers and is available in a variety of surfaces, including matte, glossy, and vinyl. The type of sticker paper you use will affect how your stickers appear and feel.
Matte Sticker Paper: This has a smooth, non-glossy texture that is ideal for a more subtle or sophisticated appearance. It's also simple to write on, making it perfect for planning or labeling.
- Price: Between $10 and $15 for 20 sheets of high-quality matte sticker paper.
Glossy Sticker Paper: It has a shiny surface that makes colors pop and gives a professional appearance. Glossy stickers are ideal for ornamental purposes.
- Price: Around $12 to $20 for 20 sheets of glossy sticker paper.
Vinyl Sticker Paper: It is ideal for creating weather-resistant, long-lasting stickers for outdoor usage, such as bumper stickers or water bottle labels.
- Price: Between $15 and $25 for 20 sheets of printable vinyl sticker paper.
Printer
A good printer is essential to making high-quality, bright stickers. Depending on the type of sticker paper you're using, you can print using an inkjet or laser printer.
Inkjet printers: They are ideal for printing vibrant, full-color artwork. Inkjet printers are compatible with both matte and glossy sticker material.
- Price: It ranges from $100 to $300, depending on quality.
- Recommended option: Canon PIXMA iP8720 Inkjet Printer - $249.99 (for high-quality, colorful prints).
Laser Printers: Laser printers are fast and efficient for printing huge quantities of stickers, but their colors may be less bright than those produced by inkjet printers. They work best with matte and vinyl stickers.
- Price range: $150-$400.
- Recommended option: Brother HL-L3210CW Laser Printer - $199.99 (excellent for printing vinyl stickers).
Design Software
To design your stickers, you will need software that lets you generate unique images or pictures. Depending on your ability level, there are a few free and paid solutions available:
Procreate: It is a popular iPad application for artists and graphic designers. It's fantastic for hand-drawing sticker designs and producing unique artwork.
- Price: $9.99 (one-time purchase from the App Store).
Adobe Illustrator: For advanced users, Adobe Illustrator is the gold standard for vector-based design. It provides precision and flexibility, letting you create stickers in any size or shape.
- Price: Creative Cloud subscription is $22.99 each month.
Canva: Canva is an easy-to-use design tool ideal for beginners. It provides a variety of templates and tools to help you create your sticker designs without needing advanced design skills.
- Price: Free for basic features, or $12.99 per month for Canva Pro.
Laminating Sheets
Laminating your stickers is a great way to increase their durability, particularly for outdoor use. Laminating sheets add a protective covering to stickers, making them waterproof and more resistant to wear and tear. Although it is optional, but will help in
Self-Adhesive Laminating Sheets: These sheets may be applied manually and are an affordable way to make your stickers more durable without the need for a laminating machine.
Price range: $10 to $15 per 25 sheets.
Thermal Laminating Machine: If you're making an extensive number of stickers, a laminating machine can be worth the investment.
Price range: $30-$80
Designing for Stickers
After you've gathered all of your supplies, the next critical step in producing professional-quality sticker is the design process. This is where you can express your creativity and transform your ideas into visually appealing, tangible things. Whether you're making for personal use, presents, or to sell online, the design is what sets your stickers apart. In this section, we'll go over the tools and methods you can use to make your own sticker designs.
Using Software to Create Sticker Designs
When it comes to designing stickers, the right software can make a huge impact. Whether you wish to hand-draw your designs or make professional, vector-based images, there is a tool available to fit your requirements. Let's study three of the most popular tools for stickers.
Procreate: Handdraw Your Sticker Designs
If you want to draw your sticker designs by hand, Procreate is a great option. Procreate, which is available on the iPad, includes a variety of brushes, colors, and layers to help you create sophisticated and original images.
Steps for Creating Stickers in Procreate
Create a canvas: Open Procreate and create a new project by picking a canvas size that fits your sticker (for example, 4x4 inches).
Sketch your design: Use the pencil tool to sketch out your design idea. Procreate's pressure sensitivity enables detailed, precise designs.
Refine Your Design: After you've completed your sketch, use various brushes to refine it. To obtain the desired look, modify the brush size, opacity, and color.
Color your design: To add colors, use layers. You can use shading, gradients, and textures to make your sticker stand out.
Export Your File: Once you're satisfied with your design, save it as a high-resolution PNG file with a transparent background. This ensures that your stickers print clearly.
Adobe Illustrator: Creating Vector-Based Sticker Designs
Adobe Illustrator is the preferred software for experienced users looking to create precise, vector-based sticker designs. Vector drawings enable you to scale your designs to any size without sacrificing quality, making Illustrator ideal for high-resolution printing.
Steps for Creating Stickers in Adobe Illustrator
Set up Artboard: Create a new artboard with proportions appropriate for your sticker (e.g., 5x5 inches). Illustrator lets you create customized sizes with exact specifications.
Design Your Sticker: Use the shape, pen, and brush tools to create your design. Illustrator provides exact control over line thickness, curves, and geometric shapes.
Add Text and Details: If you want to include text, Illustrator's typography tools provide complete control over font selection, size, and alignment. You can easily add slogans, names, or quotes to your stickers.
Apply Colors: Use Illustrator's color swatches and gradient tools to add colors. You can also use the color picker to coordinate your design's theme.
Export Your Design: Once your design is finished, save it as a vector file (EPS or SVG) for scaling or as a high-resolution PNG to print.
Canva: Quick and Easy Sticker Design
Canva is a simple tool that requires no prior design skills, making it ideal for beginners or those short on time. Canva's drag-and-drop flexibility and access to hundreds of pre-made templates make it ideal for quickly creating sticker designs.
Steps for Creating Stickers in Canva
Choose a Template: Canva offers several pre-designed templates that you may personalize for your stickers. Simply search for "sticker templates" and select one that suits your taste.
Customize Your Design: Canva's drag-and-drop editor allows you to simply add or delete items from the template. Customize the design by changing the colors, fonts, and images.
Add Graphics or Text: Canva's collection offers both free and paid icons, illustrations, and fonts. Include these in your design to make your sticker more unique.
Download Your Design: Once you're satisfied with your sticker design, save it as a high-resolution PNG or PDF to print.
Design Tips for Creating Stickers
Once you've decided on your preferred software, it's time to get creative! Here are some design factors to keep in mind when creating your stickers:
Simplicity is key: Stickers should be clear and easy to read at a glance. Avoid overwhelming the design with too many details. A simple, bold design is frequently the most effective.
Use High-Quality Images: If you've included photographs or graphics in your design, make sure they're in high resolution. This ensures that your sticker's quality is maintained throughout the printing process.
Create for Your Customer: If you are selling stickers, consider who your target customer is. Are they searching for entertaining, wacky designs or more professional, minimalist options? Customize your designs to your clients' preferences.
Outline Your Design for Cutting: If you intend to create die-cut or kiss-cut stickers, be careful to add an outline (or "cut line") around your design. This helps cutting machines figure out where to cut.
Use Transparent Background: Save your designs with a transparent background to increase their adaptability (particularly for die-cut stickers). This ensures that your design blends perfectly with whichever surface it is applied to.
How to Print Stickers?
The next step after you've created your sticker designs is to print them. You can print stickers at home, giving you more freedom and control, or use professional printing services for a polished, long-lasting finish. Both ways can give good results, depending on your requirements.
Print Stickers at Home
Printing stickers at home is an affordable choice for small batches or DIY projects. Follow these instructions to effectively print your stickers at home, especially if you use a Cricut machine for cutting and creating them.
1. Choose your paper
Choosing the right type of sticker paper is the first step toward creating amazing stickers. Depending on your design and intended use, you can choose from the following:
Glossy Sticker Paper: Perfect for decorative stickers, with a shiny finish and bright colors.
Matte Sticker Paper: Ideal for a more modest appearance, particularly for calendars or labels.
Vinyl Sticker Paper: The greatest choice for waterproof and outdoor stickers, ideal for long-term use.
2. Print and Cut Sticker
Cricut machines are ideal for cutting stickers after printing. Here's how to use Cricut to make your sticker designs come to life:
Prepare your design in Cricut Design Space: Upload your sticker designs to Cricut Design Space. Arrange your designs on the canvas and check if they're ready for cutting by selecting the "Print then Cut" option.
Set up your printer: For bright stickers, use an inkjet printer with the highest quality setting. Check that your sticker paper is compatible with your printer (e.g., glossy, matte, or vinyl).
Print your stickers: After confirming that the settings are correct, print your stickers on your preferred sticker paper.
Cut Stickers using Cricut: Once printed, apply the sticker sheet to the Cricut cutting mat. Use the Cricut machine to cut around each sticker.
Professional Sticker Printing Options
Professional sticker printing is a good choice for people who desire a more polished appearance or require large quantities. Here are some popular printing services:
- Vistaprint provides customized printing for stickers, including vinyl and die-cut stickers. Vistaprint is perfect for bulk orders and promotional stickers.
- Sticker Mule, known for its high-quality stickers, provides waterproof and durable stickers ideal for outdoor use.
- Printful offers print-on-demand services for stickers that can be immediately mailed to customers, making it an excellent choice for businesses.
How to Cut Stickers?
After printing your unique stickers, the next essential step is to cut them to the correct form. This step completes the process, ensuring that your stickers appear professional and are easy to use. Kiss-cut and die-cut are the two most common sticker-cutting processes, and each has its own set of advantages depending on how you want to use them. Let's look at the differences and determine which strategy is ideal for your project.
Kiss Cut Stickers
Kiss-cut stickers are designed such that the cutting blade only goes through the top sticker layer, leaving the backing paper intact. This means that the sticker remains attached to a bigger sheet of backing paper, making it easier to remove and apply. Kiss-cut stickers are ideal for sticker sheets, which feature several designs printed on a single sheet and can be peeled off as needed.
Benefits of Kiss-Cut Stickers
Easy to Peel: Because the backing is intact, the sticker can be removed without damaging the edges.
Perfect for sheets: Perfect for printing several stickers on a single page, delivering simplicity and efficiency.
Protects the sticker: The additional backing around the sticker provides increased protection during storage or transport.
Use cases:
- Sticker sheets with multiple designs.
- Promotional items where easy peeling is needed.
- Planners and decorative sticker kits.
Die-Cut Stickers
Die-cut stickers are cut all the way through both the sticker layer and the backing paper, resulting in a unique shape that fits the sticker design. This kind of cut allows each sticker to have its own backing and form, giving it a high-quality, professional appearance. Die-cut stickers are ideal for single stickers and are frequently used for branding or eye-catching designs.
Benefits of Die-Cut Stickers:
Custom Shapes: Allows you to make custom-shaped stickers that match the design, making the sticker more visually appealing.
Professional Look: The sticker is perfectly cut to its shape, resulting in a glossy and finished appearance.
Durability: Because die-cut stickers are frequently used separately, they are usually more robust, making them acceptable for outdoor use (particularly with vinyl stickers).
Use Case:
- Single stickers for branding purposes, such as logos or promotional things.
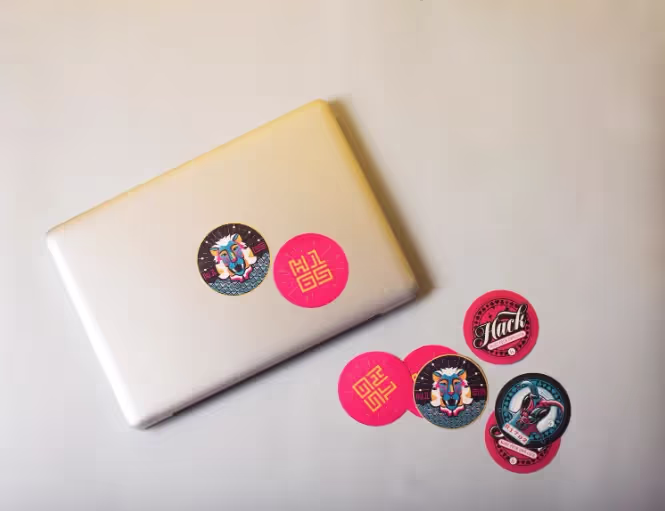
- High-quality, eye-catching designs, such as laptop or car graphics.
- Marketing items that have to make an impact.
Using a Cutting Machine for Kiss Cut and Die Cut Stickers
If you're using a cutting machine like a Cricut or Silhouette, you can quickly switch between kiss-cut and die-cut modes to suit your needs. These machines enable exact cutting, making it simple to create both types of stickers. To cut using the machine, simply upload your design and adjust your settings according to your cutting type, and the machine will cut as per the instructions.
Different Types of Stickers You Can Make
When it comes to producing customized stickers, the material you choose has a significant impact on how they look and feel. The material you use influences not just the design but also the durability and overall impression of your stickers. Whether you're manufacturing stickers for amusement, business branding, or internet sales, choosing the correct type of sticker is critical. Here are the most common sticker types that you can design based on your requirements.
Vinyl Stickers
Vinyl stickers are well-known for their durability and adaptability. They are composed of high-quality vinyl that is waterproof and weather-resistant, making them suitable for indoor and outdoor use. Vinyl stickers are an ideal alternative for creating automobile decals, laptop stickers, and water bottle labels.
Advantages of vinyl stickers:
- Waterproof and weatherproof
- Durable in outside conditions.
- Personalizing
Use Cases: Car Decorations, Water Bottles, Laptops, and Gadgets
Matte stickers
Matte stickers have a smooth, non-glossy texture, giving them a more understated and elegant appearance. The matte surface reduces glare, making them visible from all angles. These stickers are ideal for projects that require a delicate, beautiful appearance, and they are frequently used as labels or decorative elements in plans.
Advantages of Matte Stickers:
- Non-reflective finish
- Sophisticated appearance
- Writable surface
Use Cases: Product Label, Planners, Stickers, Decorative Application
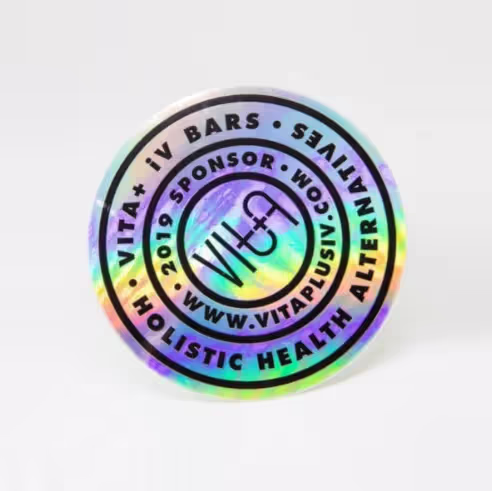
Holographic Stickers
Holographic stickers are visually appealing and distinct due to their iridescent look, which changes colors when viewed from different angles. These stickers stand out from the crowd and are frequently used in artistic projects, collectibles, and special promotions. The holographic surface adds a colorful and dynamic element to your sticker designs, making them perfect for grabbing attention.
Advantages of Holographic Stickers:
- Glossy finish
- Unique appeal
- Customizable
Use Case: Artistic projects, merchandise, and promotional stickers
DIY Sticker Methods
For people who enjoy hands-on crafting or do not have access to cutting machines such as Cricut or Silhouette, various inventive and cost-effective DIY sticker methods do not require complex tools or equipment. These methods allow you to make stickers at home with little tools, making them ideal for beginners, artists, and anybody wishing to create customized stickers without a machine. The following are some popular DIY sticker-making methods:
Glue Stickers
Glue Stickers are one of the simplest ways to make homemade stickers using everyday items. This method is ideal for making affordable stickers or enjoyable projects with kids. Here's an easy way to produce your own glue stickers at home:
Steps for Making Glue Stickers:
Print or Draw Your Design: Begin by printing your sticker design onto standard printer paper or drawing it by hand. Make your design simple and easy to cut out.
Cut Out Your Design: Once your design is complete, cut it out with scissors or a craft knife. You can make any form you want, ranging from simple circles to more complex designs.
Apply Glue to the Back: Flip your cutout design over and apply a thin amount of glue to its back. You can use either a standard glue stick or a homemade glue solution. If you're using liquid glue, apply it evenly to prevent lumps.
Let it Dry: Allow the adhesive to completely dry before applying the sticker. Once dried, your sticker is ready to use.
Activate the Adhesive: To apply the glue sticker, softly moisten the back with water. This activates the adhesive and allows the sticker to attach to surfaces.
Advantages of Glue Stickers:
- Cost-Effective
- No Special Equipment Needed
- Customizable
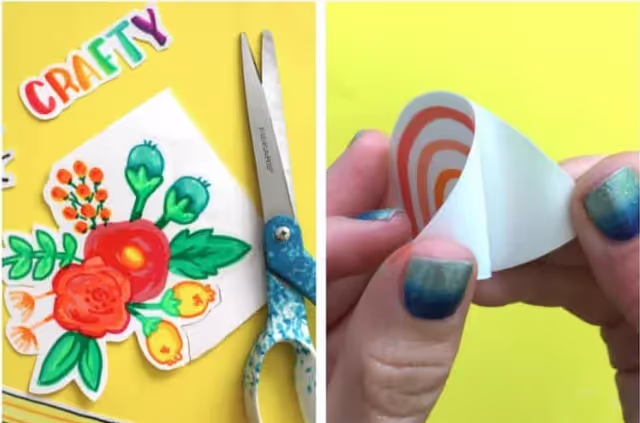
Making Packing Tape Stickers
Packing tape stickers are another simple and useful DIY activity that only requires a few household objects. This process not only offers your stickers a professional, water-resistant finish, but it's also great for creating long-lasting stickers that can survive wear and strain. Here's how to make your own packing tape stickers.
Steps for Making Packing Tape Stickers:
Print or Draw Your Design: As with adhesive stickers, begin by printing your sticker design on ordinary paper or drawing it by hand. The idea is to choose a pattern that fits the width of your packing tape.
Cut Out Your Design: Once your design has been printed or sketched, cut it out using scissors or a craft knife. Make accurate cuts, especially if you're trying to get a perfect shape.
Apply Clear Packing Tape: Place a strip of clear packing tape on the front side of your sticker design, pressing firmly to prevent air bubbles.
Trim the Edges: Take scissors and trim around the edges of your sticker. Leave a thin border of packing tape around the edges to ensure that the sticker is thoroughly laminated and does not readily come off.
Apply to Surfaces: Once your packing tape sticker has been cut and prepared, it can be put straight on surfaces such as notebooks, water bottles, and even windows.
Advantages of Packing Tape Stickers:
- Water-resistant
- Affordable.
- Quick and easy.
How To Sell Your Stickers Online?
If you've developed a passion for making stickers, selling them online is an excellent method to supplement your income. With platforms like Spocket's Print on Demand (POD) service, you can simply scale your sticker business without having to worry about manufacturing or shipping costs. Spocket streamlines the entire process, allowing you to focus on designing and selling your stickers while the platform handles the rest.
You can also integrate your Shopify and other stores with Spocket and use Spocket print-on-demand services to sell customized stickers. Whether you are a dropshipper or an influencer on social media who is aiming to sell your merchandise to your fans, Spocket offers you a plethora of options and flexibility with its quality printing to give your customers a unique and amazing experience.


.webp)